Article #3
The last two installments we showed a basic bale foundation and how to start stacking the bale walls. This time, we will be short on the descriptions and just show you some photographs that are very self explanatory.
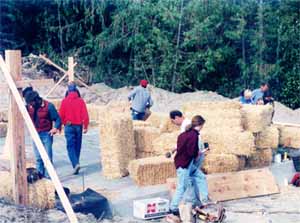
The first photo shows how hectic it can get around the frenzy of bale stacking. It is an exciting time with people and bales all over the place, but also one that you must keep control over. Each of your four walls (assuming a rectangular home) should have a wall captain. Someone who has been given instructions on how to do this prior to the wall raising.
This person will keep the wall going up straight, that the bale placement is correct and make sure all the window frames are installed.
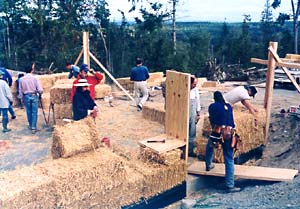
Here we see a door and window frame combination in the process of being installed. Ideally, all your frames should be assembled and ready before your wall raising starts. In this case the frames are constructed of 2x4s and ½" plywood, stuffed with straw.
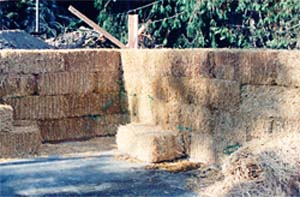
The last photo in this article, a corner completed up to the 4th course, with corner guide post still in place. With good bales and careful placement the walls should be nice and level and straight. You can also see in this photo the green poly strapping we used for the wall tie downs. This is special 800 lb test strapping - specified by our structural engineer (yes, we did have to do that - we were the first fully permitted load bearing strawbale residence in Jefferson County, Washington)
Next time, we'll give you more technical stuff again, thought you would enjoy seeing what a wall raising weekend looked like.